RAILFAN GUIDES of the U.S.
Todd's Guide to
MAKING the PERFECT RAILROAD MAP :-)
RAILFAN GUIDES HOME
RAILROAD SIGNALS HOME
Every now and then, folks ask me how I make my maps.
First, I use Corel Draw as my drawing package. I started using it 20 years ago with version 5 when it was $350 vs something like 900 bucks for Photoshop. I have never regretted that decision based solely on price. Using Corel Draw also worked in my favor for many years when I worked for my company, for they too had chosen Corel Draw as their graphics package of choice, until they upgraded to Windows 7.
Under the WYSIWYG interface, Corel is using vector graphics to draw everything you see. Solid objects get filled with color. Drawings wind up taking a lot less memory space. One of my typical maps is around a 70K CDR file, but when saved as a JPEG, can easily be a 2meg file!!! IF you decide to add a JPEG to a Corel drawing, and save it as such, it will easily drive the CDR file up towards the 2-3 megs size, or bigger, depending on the size of the JPEG.
So let's get into the process.
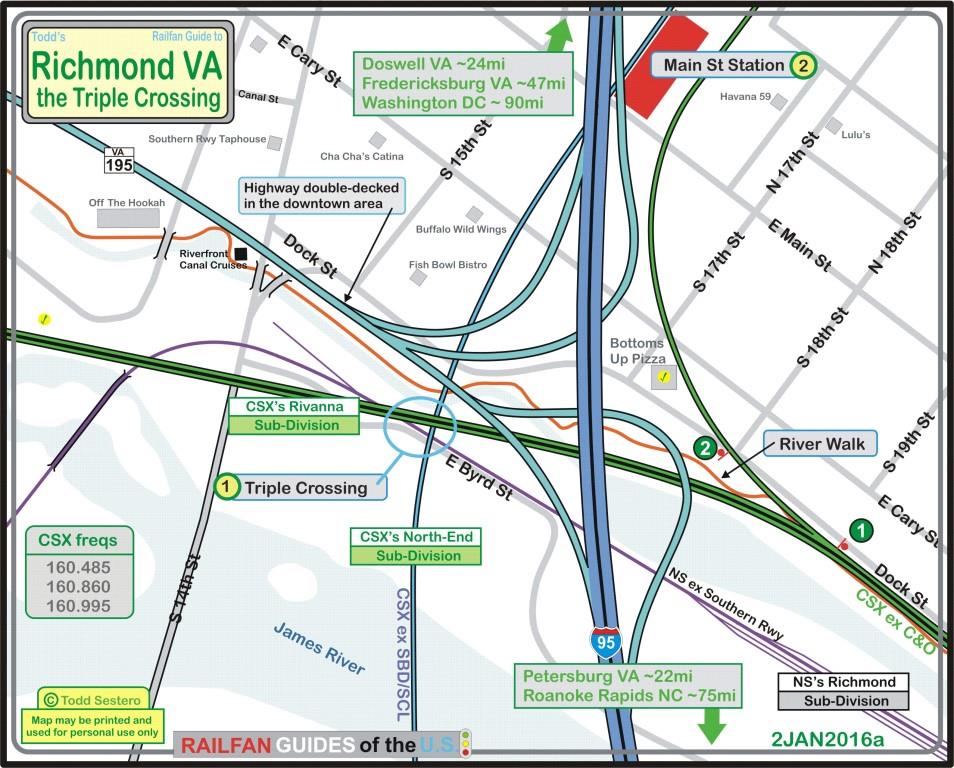
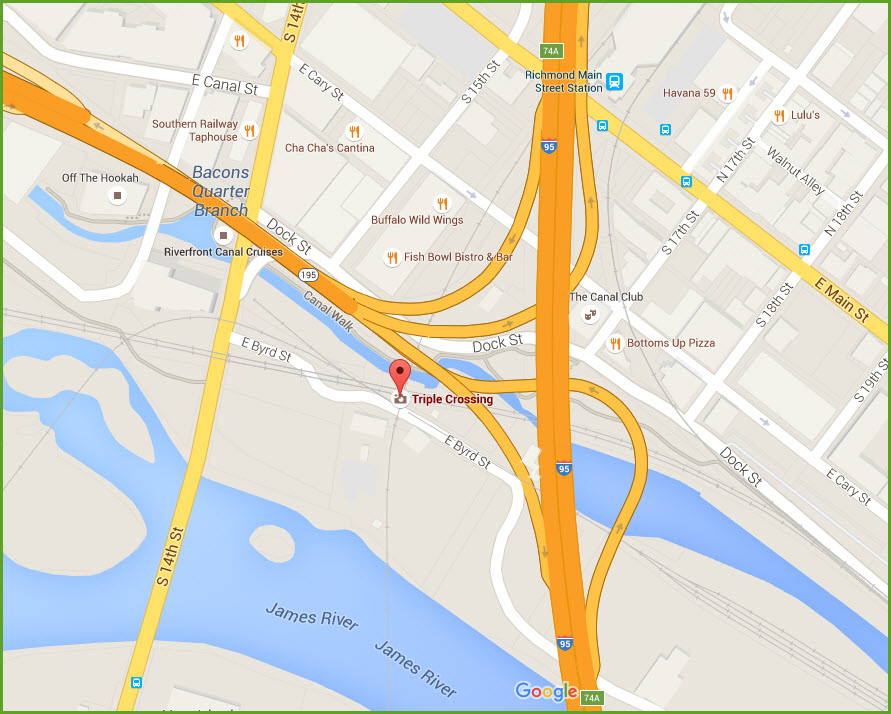
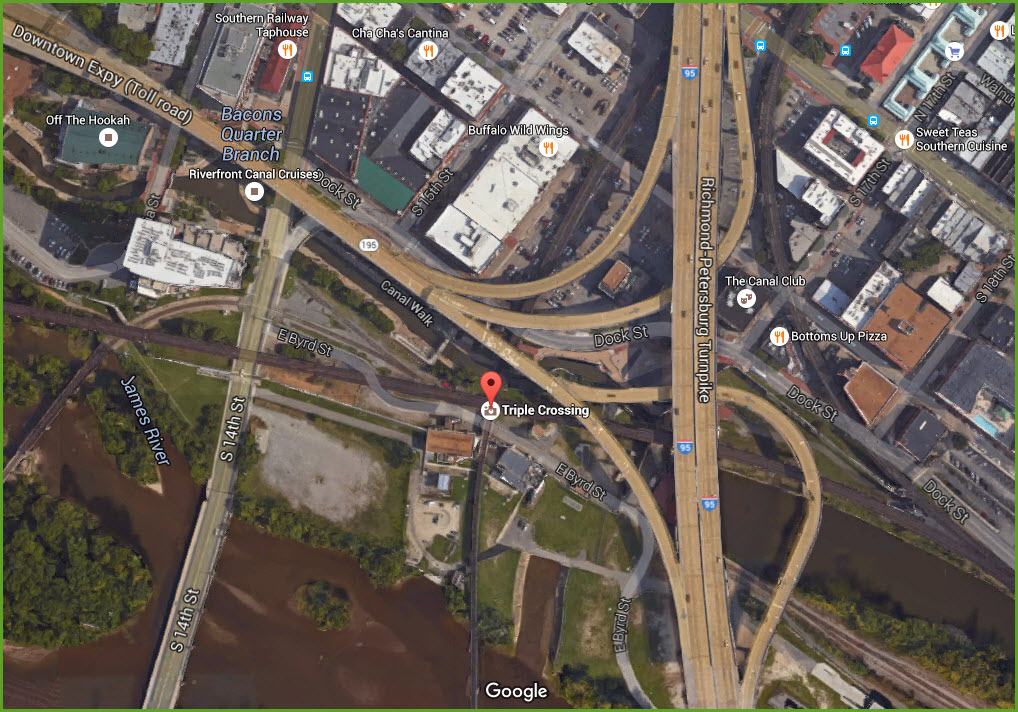
First thing I do is to decide on the area I want to draw. I usually use Google maps, but once in a while I will also use Bing Maps. Let's pick the Triple-Crossing area of Richmond VA as an example.
BTW, I use Techsmith's Snag-It as my screen capture program. It's a great program, I use it every day for something. I wouldn't be able to do my website or maps without it.
If I am doing a full size map, I will decide whether the portrait or landscape will fit the area better. If I am doing a small area map, the size is what it is.
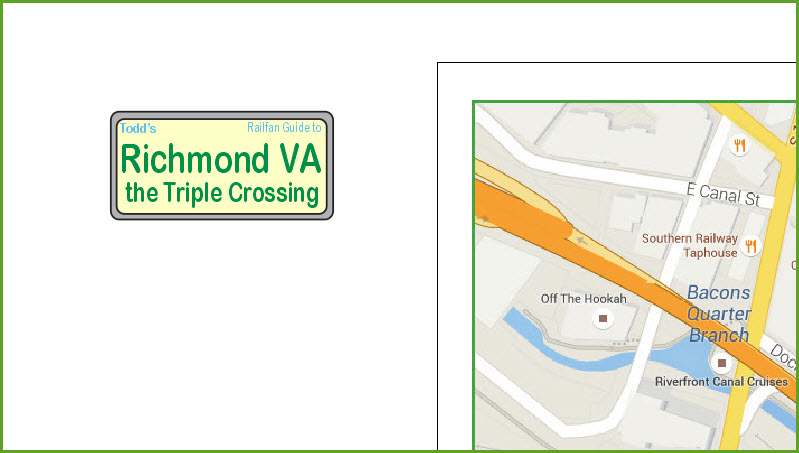
So I open Corel Draw, and I import my default drawing, which contains the many map elements you are used to seeing on my maps. I have created them over the past 15 years of using Corel Draw to do my maps. The default page looks like the screen capture below. Whatever I don't use, I just delete it. There is also a default map for the landscape format off to the right that is not shown.
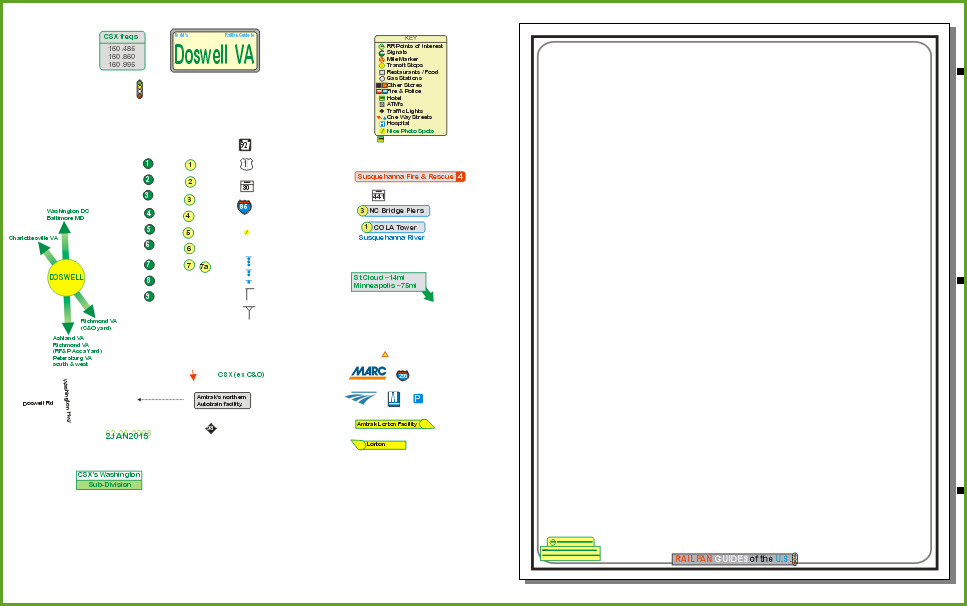
Now I import the map I just captured. Since this isn't a full size map, I delete the default map border.
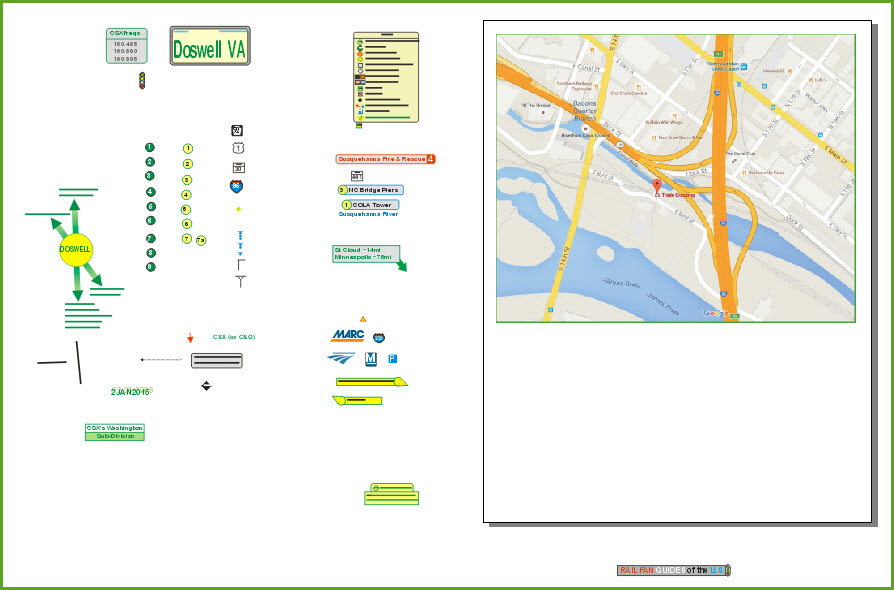
I delete the unused maps symbols, and edit the map title block.
I rearrange things around the outside of the map to make it easier on me, move the title block and some of the other stuff onto the map.....
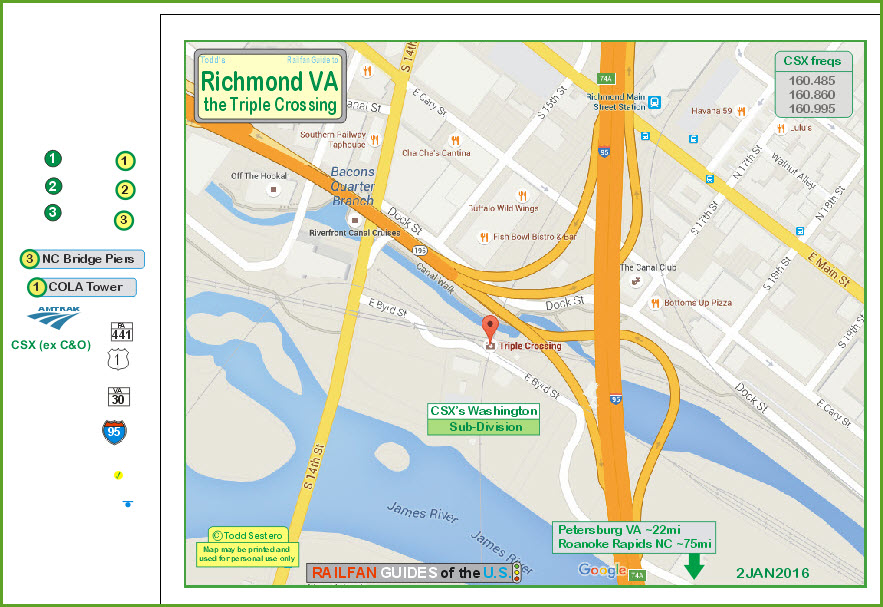
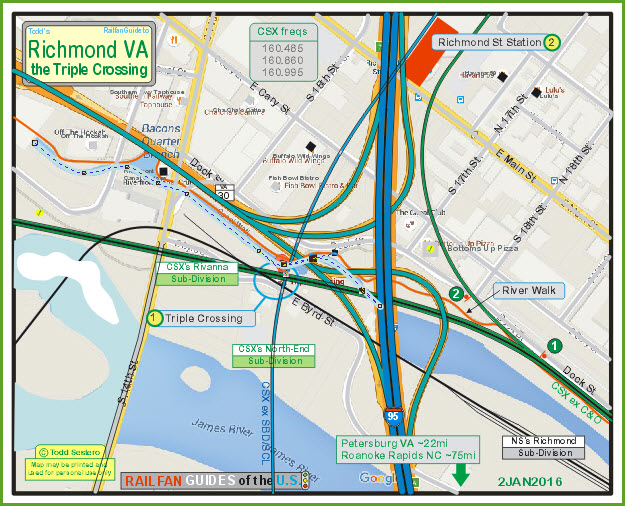
Now I can start adding lines for the tracks and streets/highways. I usually use a 2 point line width for streets and tracks. I usually do not show multiple tracks. Unless you are doing a detailed detail map, it only clutters up the map to draw four lines for a 4-line mainline. With detail maps such as this one, I will often use 4 point or larger line widths for the streets, only because the scale would be off if I didn't.
Corel Draw puts everything in "layers". The last thing you drew, will be in the top layer, "on-top" of everything else you have on the drawing. There are commands to put the object on top, on the bottom, or move it layer by layer to position it exactly where you want. This is how we can get a road to appear "over", or "on top of" a railroad track, or vice-versa.
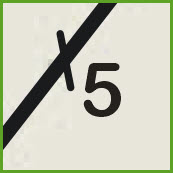 On many of my maps, I
will use a hash mark and a number to tell you how many tracks there are.
On many of my maps, I
will use a hash mark and a number to tell you how many tracks there are.Sometimes, you can't do it all, and we have to make exceptions and draw just an itsy-bitsy section to make a road go over a track, because the track has been on top of everything else while the road also goes over and under other roads....... The next step in the series below would be to make the short grey section blue to match that of the railroad line color.
 Before
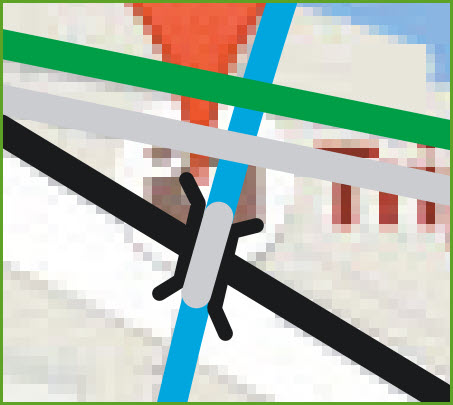 After
AfterThe map progresses; the important sights are in, most of the tracks are in place as well as the roads - still need the highways tho, and since they are above everything else, we are saving them for last. You have to know Richmond to get a feel for this!
As you may know, I like to highlight a number of things on my maps: restaurants/places to eat, banks, gas stations, KMarts, Walmarts and the like, and any other notable feature. The symbols I use for signals are not FRA accurate, for I just want to show where they are, and their orientation. I make them from a circle and a rectangle, and then group the two objects. I do this so that I can change the color using the Corel Draw color select toolbar at the right side of the window - it is easier than clicking on the line symbol and having to go thru the menu of options to select line attributes.

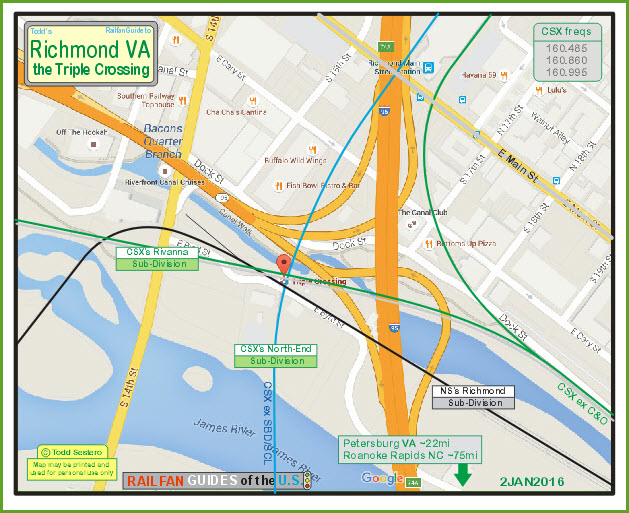
The map is nearing completion after adding highway and track details. I've been a big fan of making maps since I was a kid. As such, I tend to favor the traditional way of depicting details on maps, so I usually outline elevated roads and tracks with black lines to indicate they are on a bridge structure. It takes more time this way, but I'm doing the maps to please myself.
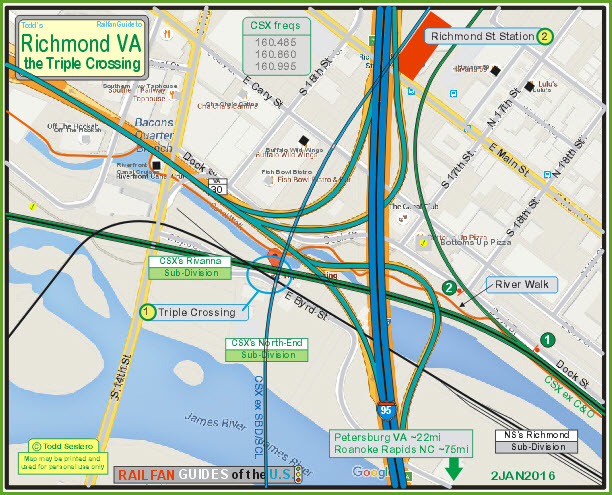
One of the last things to add is the water before we go and make sure everything is on it's proper level/layer. When a road and a track meet at a grade crossing, I usually give preference to placing the track "above" the road. To me, it just makes the map look cleaner, especially since I am trying to highlight the railroads on my maps.
We also double check the map against an aerial view. If everything looks good, I can also now delete the underlying map JPEG.
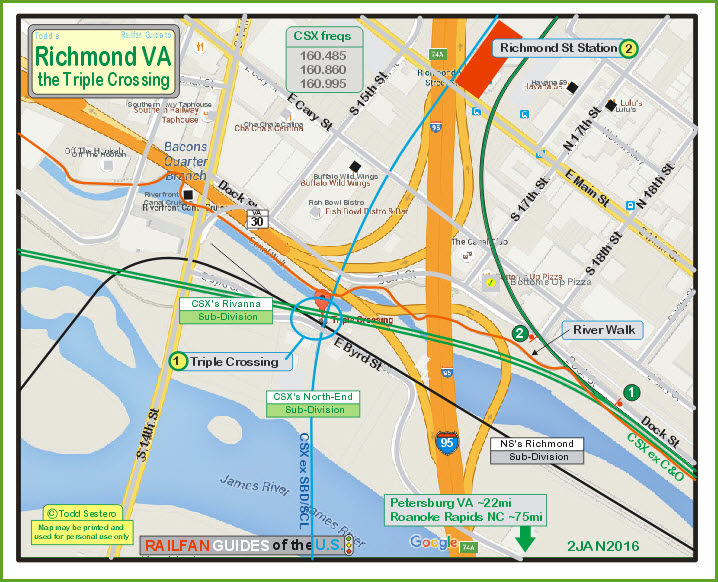
And the final product looks like this. In case you're wondering why I always have a large outer border on my maps, it is to hide the ends of the lines on the map. It's the easiest method to do so.
For the purposes of putting the map on my webpages, I have run the 2.2meg JPEG through a Microsoft program that reduces the size of the file by approximately 90%: Windows Picture Manager. In the later version of Microsoft Office, the application is hidden amongst the various aps. I don't know if it is still included in the vary latest versions of Office tho. Despite what many people think of Microsoft products, I have found it to be an extremely useful and easy to use photo editing tool, along with Snag-It. I choose the documents level of compression. The resolution is sufficient for most applications. I also usually try to save the file as a PDF to make it easier to print. This drawing went from 2.22meg file to a 135K file.